
This guide will help you create a TikTok Pixel in TikTok Ads Manager and integrate it into your BettaMax store. Once complete, your store will start sending customer behavior data to TikTok to measure conversions and optimize your advertising campaigns. This process takes approximately 20-30 minutes.
Before we begin:
- You already have a TikTok for Business account, or will create one in the process.
- The BettaMax store has been created and is now operational.
- Using Chrome browser (you need to install the extension in Step 4)
Step 1: Create a TikTok Ads account and access Events Manager. #
If you don’t already have a TikTok Ads account, create one before continuing. If you already have one, log in and go directly to the Events section.
- Visit ads.tiktok.com/i18n/signup/ and create an account using your email or TikTok account .
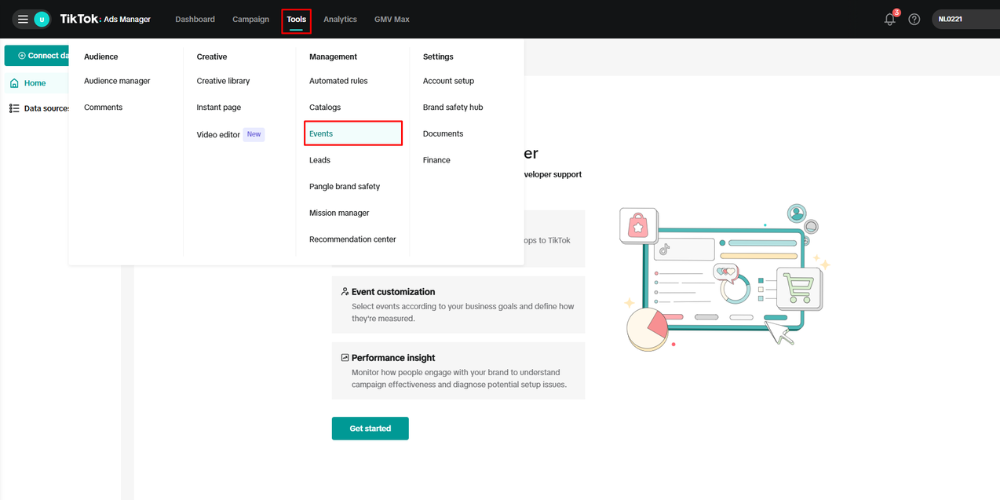
- After logging in, click Tools in the top menu bar.
- Select Events from the dropdown.
Step 2: Create a new TikTok Pixel #
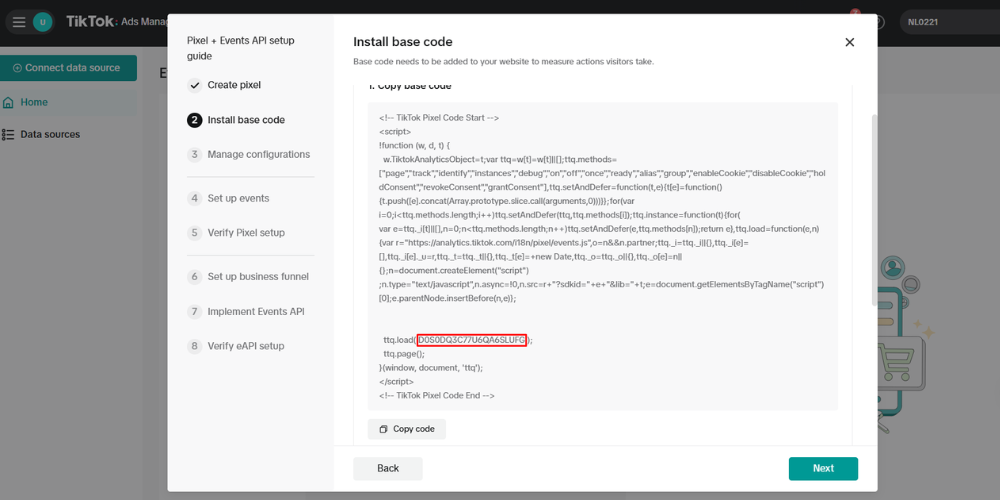
In Events Manager, create a new Pixel and obtain the Pixel ID to assign to BettaMax. This process involves several consecutive configuration steps on TikTok.
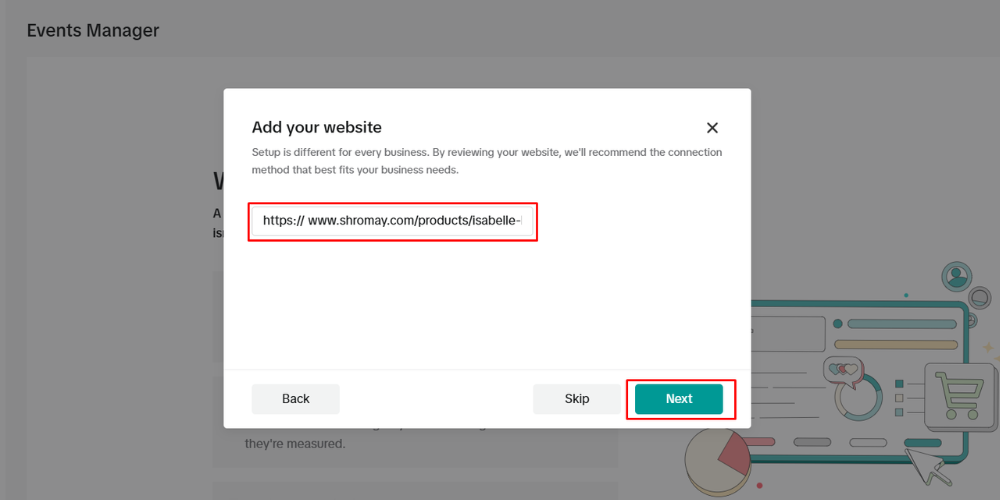
- In the Events screen, click Add Website Pixel or Create Pixel .
- Enter your BettaMax store URL in the dialog box, then click Next .
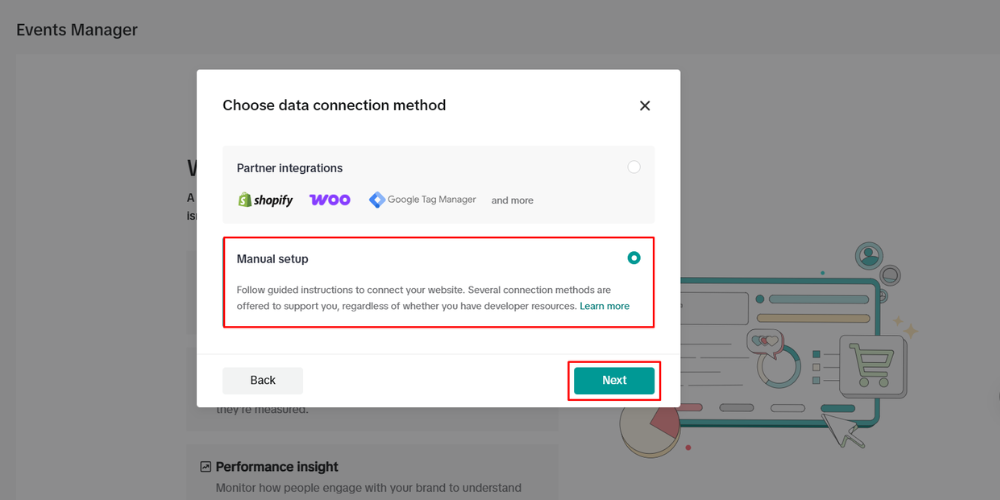
- Select the installation method: Manual Setup , then click Next .
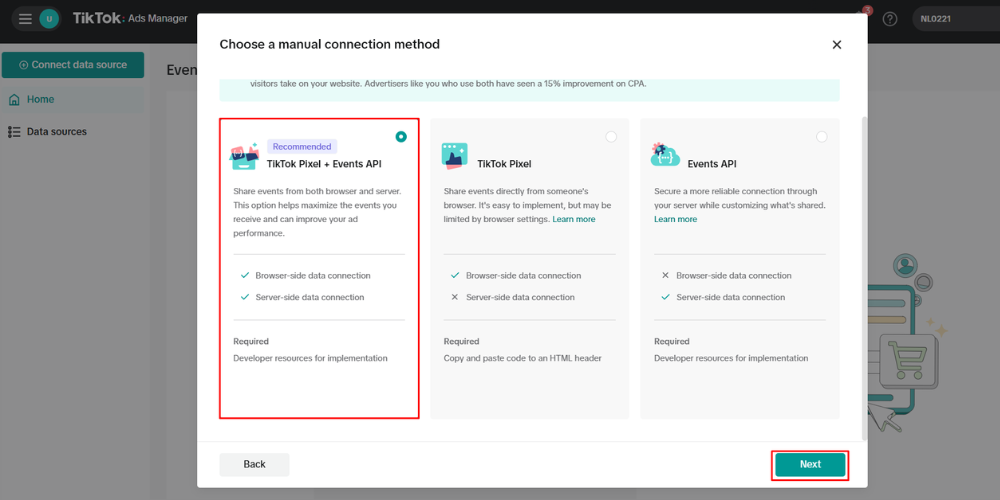
- Select the tracking type: TikTok Pixel + Events API , then click Next .
- Name your Pixel (maximum 128 characters, for example:
BettaMax Store - TikTok Pixel), then click Create .

- Copy the Pixel ID displayed on the screen.
Step 3: Attach Pixel ID to BettaMax #
After obtaining the Pixel ID, enter it into BettaMax and select the products you want to track. You can assign Pixels to multiple individual products.
- Log in to admin.bettamax.com .
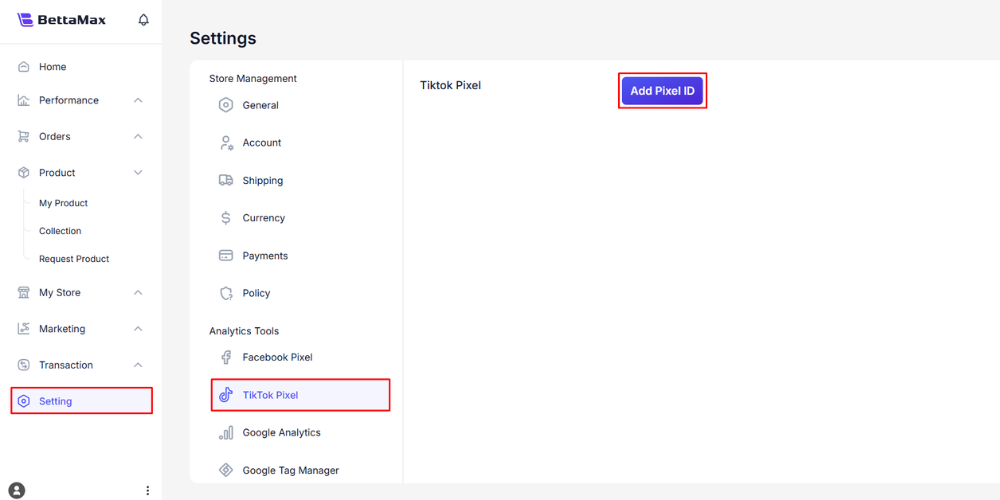
- From the sidebar, select Settings > TikTok Pixel .
- Tap Add Pixel ID .
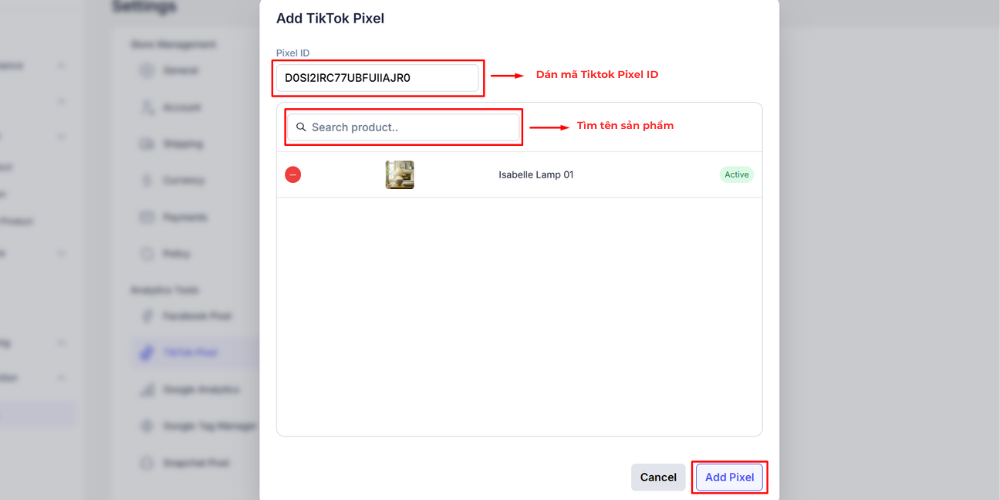
- Paste your Pixel ID into the input field.
- In the Search Product field , enter the name of the product you want to add a Pixel to and select from the suggested list.
- Press Add Pixel to complete.
Step 4: Verify Pixel #
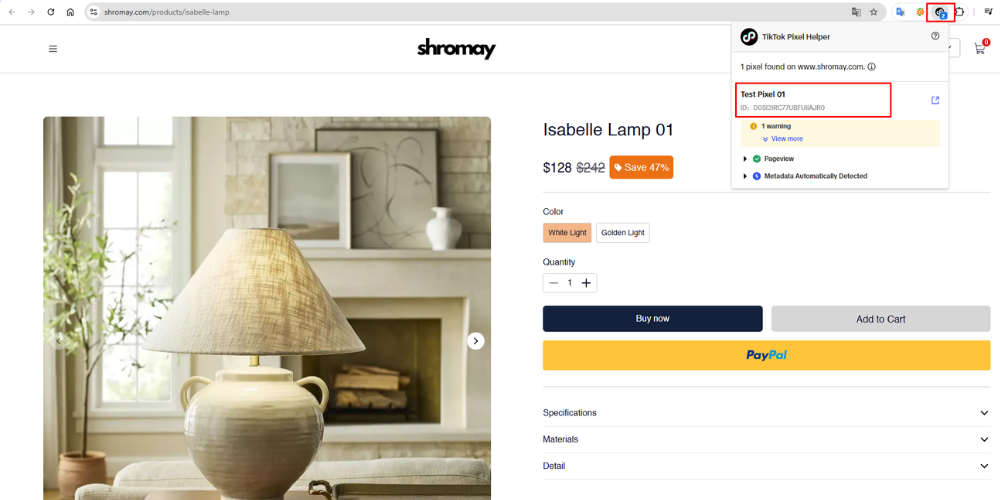
After linking your Pixel ID to BettaMax, use the TikTok Pixel Helper extension to confirm that the Pixel is being correctly launched in the store. This step needs to be done in the Chrome browser.
- Go to the Chrome Web Store , search for TikTok Pixel Helper , and click Add to Chrome to install it.
- Open the product page with the Pixel on your store.
- Click the TikTok Pixel Helper icon on the Chrome toolbar.
- Wait 3-5 minutes for the extension to verify.
- Check that your Pixel ID appears in the list and there are no errors.
Step 5: Set up Events #
Once Pixel is up and running, set up the events to track in TikTok Events Manager to accurately measure conversions. Prioritize setting up the Purchase event first.
- Go back to TikTok Ads Manager > Tools > Events , and select the Pixel you just created.
- Press Next to proceed to steps 2 and 3.
- At step 4, click Launch Event Builder .
- Select All Events > click Add Event .
- Select the URL Visit event type , then click Next .
- Select the appropriate Event Type (e.g.,
Purchase,Add to Cart,View Content). - Enter the URL condition in the URL Contains field (for example, enter
/thank-youto track the order confirmation page). - Click Next to complete the remaining steps.
Step 6: Verify the event using a Live Test. #
After setting up the event, verify it using the QR code to confirm that the event has been correctly recorded before running the actual ads. This step requires a phone with the TikTok app installed.
- Go to Tools > Events > Data Sources , then click the name of the created Pixel.
- Enter the product URL in the verification field.
- Click Generate QR Code .
- Use the TikTok app on your phone to scan the QR code.
- Interact with the product page on your phone (view products, add to cart).
- Go back to the Test Events tab on your computer and confirm that the events appear in the real-time list.