
If you are running Facebook ads for dropshipping products, Conversion API is an essential tool to accurately track customer behavior on your website. This guide will show you how to install Facebook Conversion API on your BettaMax store quickly and easily.
What is Conversion API?
Conversion API (CAPI) is an advertising tracking tool designed to help users track customer actions on your website after they click on an ad. This tool sends data directly from your server to advertising platforms like Facebook Ads or TikTok Ads, instead of relying solely on cookie-based tracking like traditional Pixel.
Overall, Conversion API also sends user data similar to Meta Pixel, but it has several advantages. It transmits data directly from your website server to Meta’s server and does not depend on the browser. Therefore, even if the device or browser blocks Pixel tracking, CAPI can still collect data and ensure stable tracking performance.
You may also be interested in: How to Integrate Facebook Pixel into Your BettaMax Store
How to Install Facebook Conversion API on BettaMax
Step 1: Log in to Your Ads Account
Go to your advertising account at: https://business.facebook.com/
Then select Settings → Data Sources → Datasets and Pixels.
Step 2: Create and Name a Facebook Pixel
In the top-right corner, click More to open the Create new dataset dialog.
Enter a Pixel name that is easy to remember and distinguish from other Pixels.
Click Create to complete the Pixel setup.
![]()
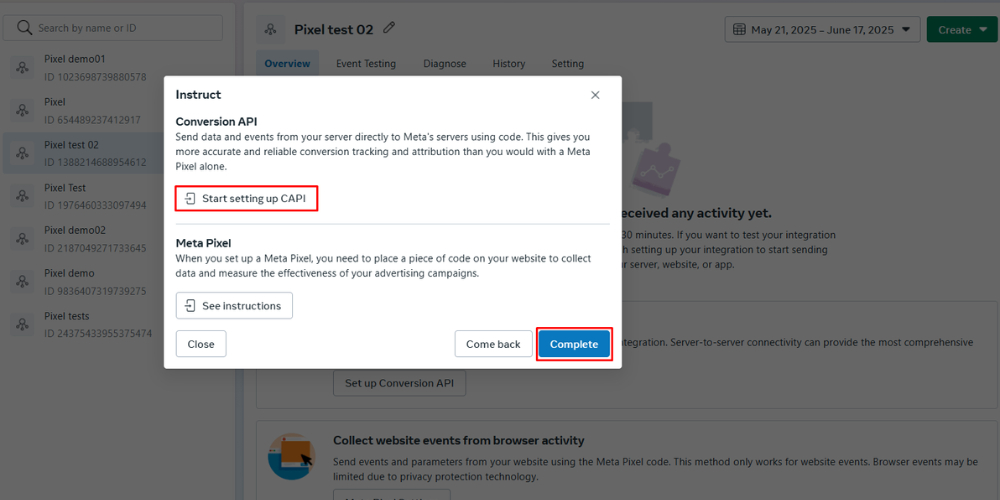
Step 3: Set Up Conversion API
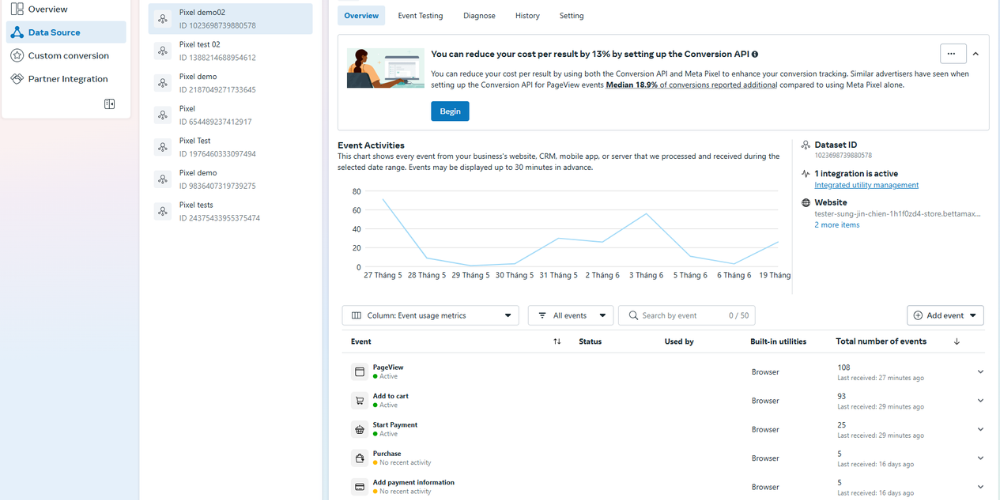
After creating the Pixel, you will be redirected to the Data Source page.
Follow these steps:
- Click Set up Conversion API
- Choose Manual setup → Next
- Select Conversion API and Meta Pixel → Next
- Click Start setting up CAPI → Complete
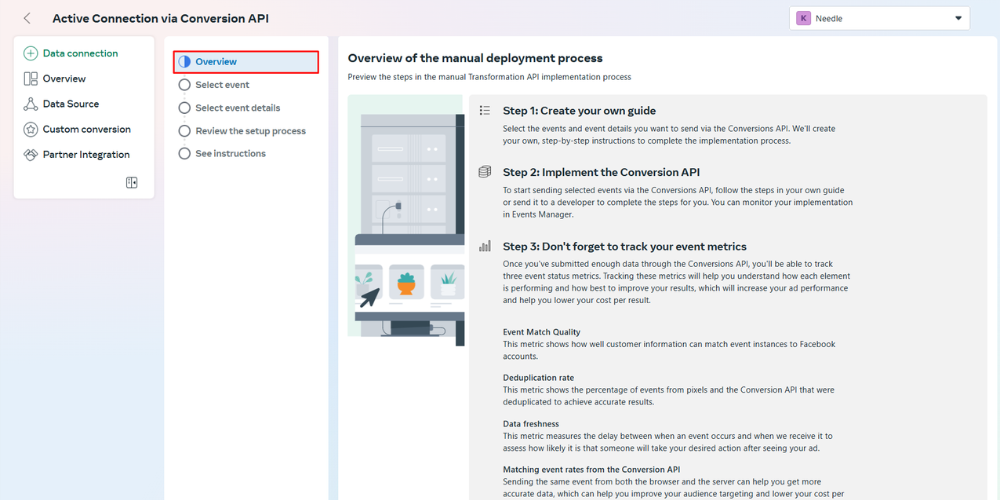
Step 4: Connect Activity via Conversion API
Overview: The system provides detailed steps in the manual Conversion API deployment process. After reading → Click Continue.
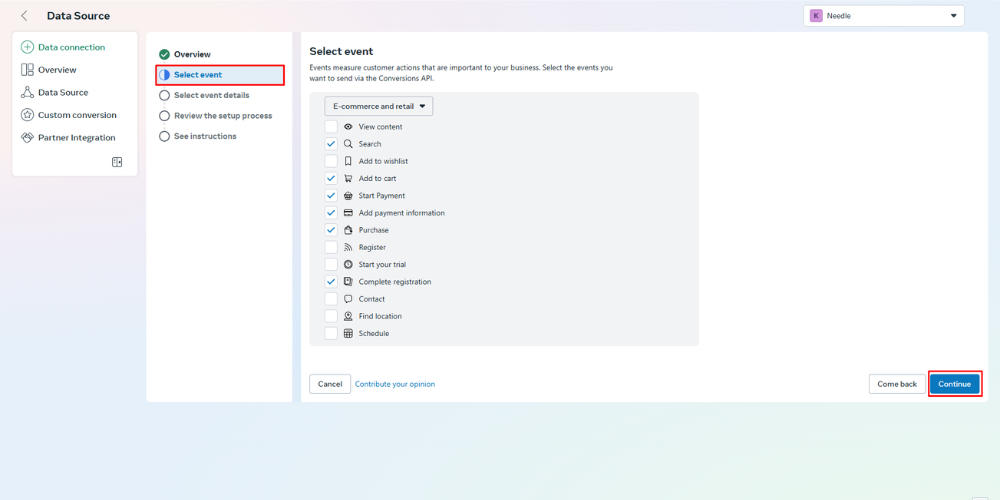
Select event: At this step of installing Facebook Conversion API, you tick the customer actions on the website that you want to send via Conversion API → Click Continue.
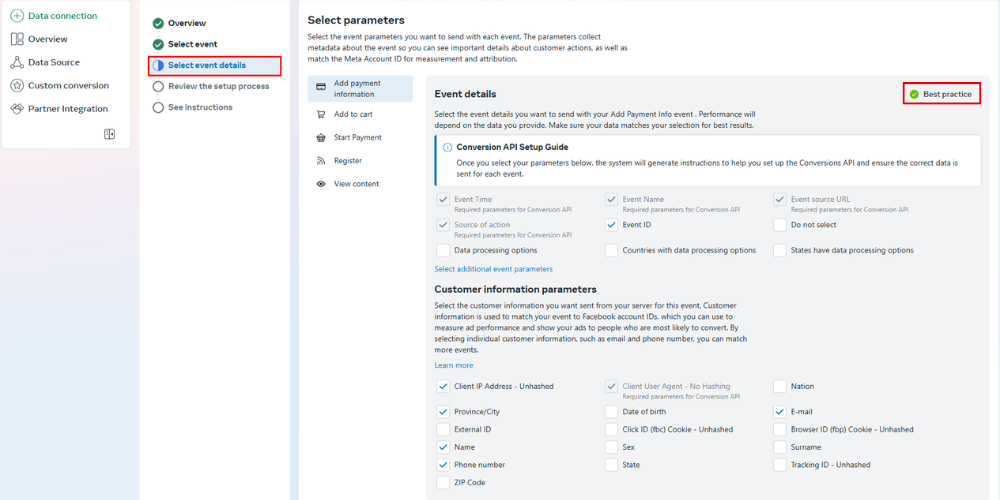
Select event details: Users select detailed event parameters to track until the green Best Practice checkmark appears at the top right corner of the screen → Click Continue.
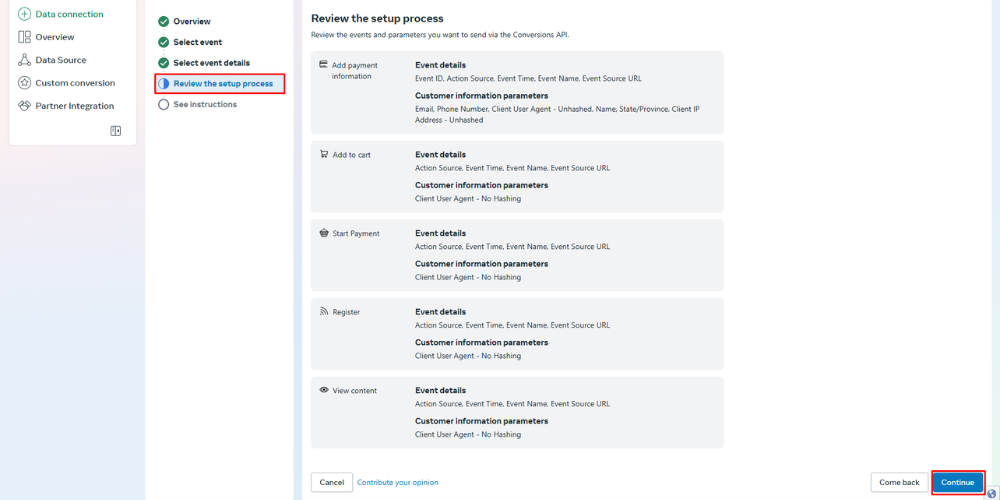
Review the setup process: You review the parameters you want to send via Conversion API. If there are no mistakes → Click Continue.
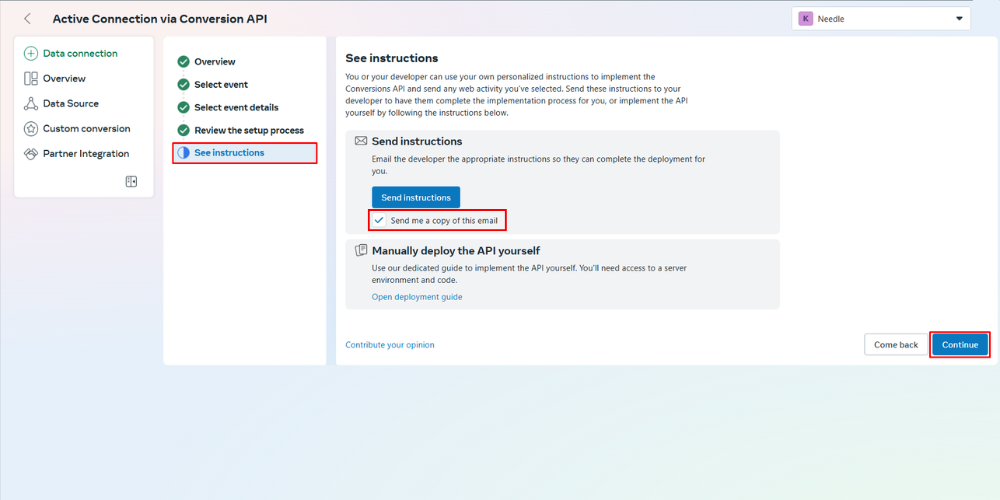
See instructions: Users choose whether to send Conversion API installation instructions via Email or not → Click Continue.
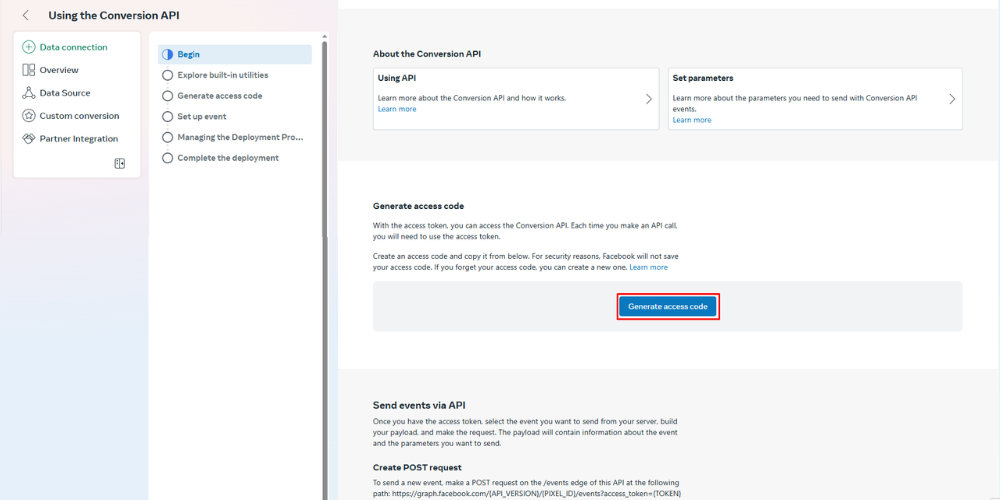
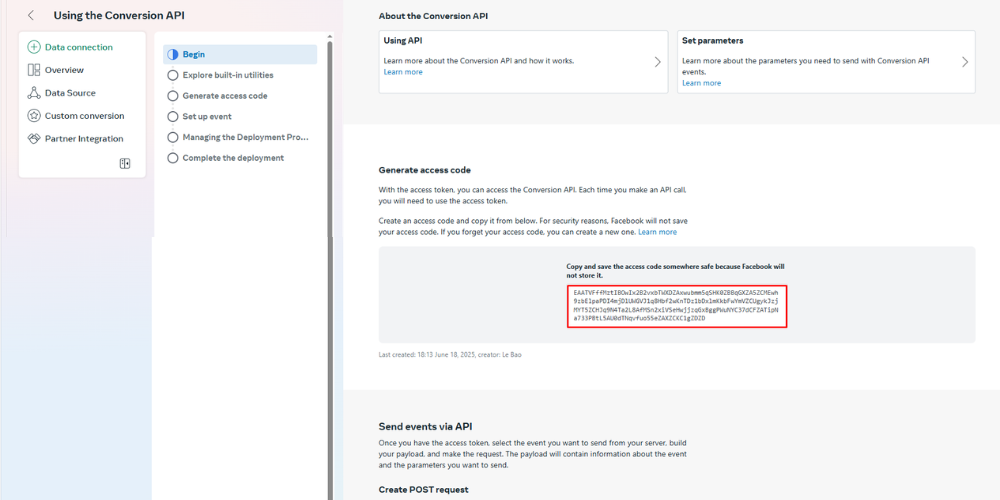
Step 5: Generate Conversion API code and Meta Pixel
Users click Generate access code → After the system successfully generates the API code, you copy this code to prepare to install Facebook Conversion API into the BettaMax store.
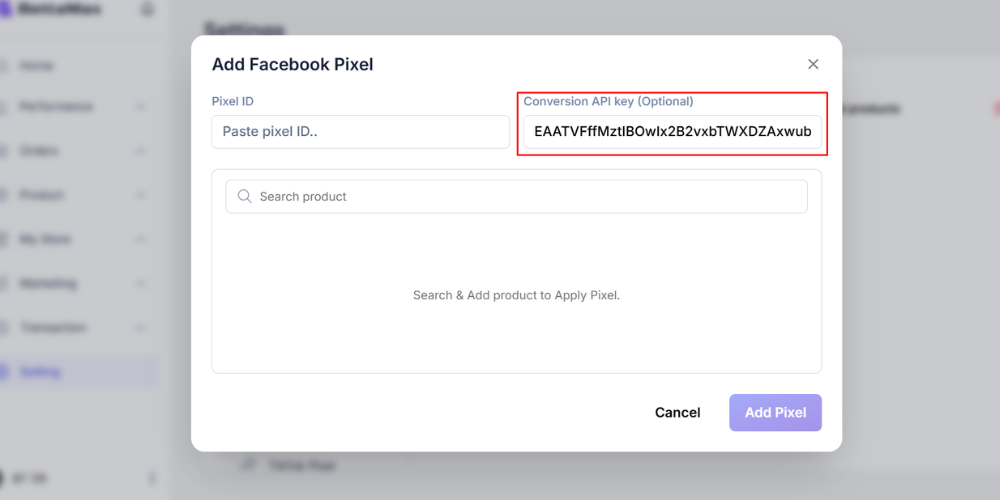
You log in to the store on BettaMax → Setting → Facebook Pixel → Add Pixel ID.
In the Add Facebook Pixel dialog, you paste the API code into Conversion API key (Optional).
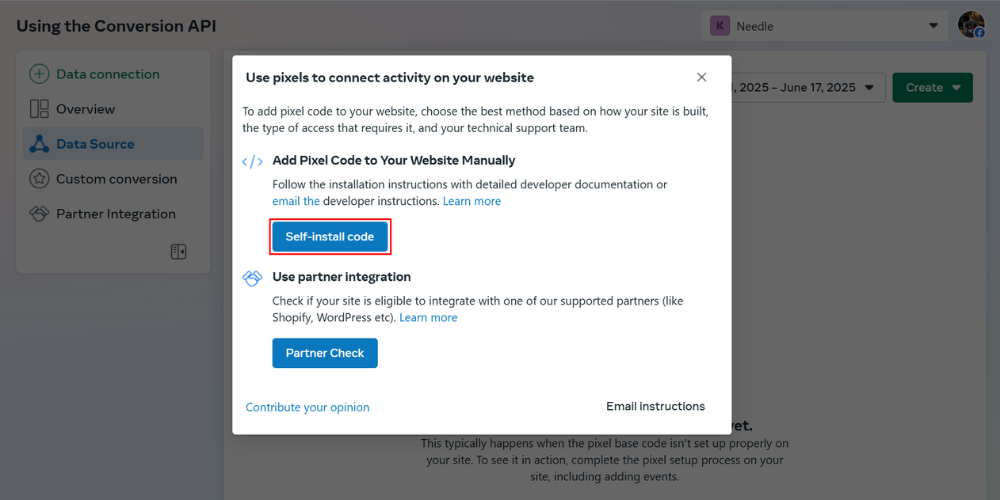
Then, you return to the Conversion API setup screen → Click Complete → The system will take you to the Using the Conversion API page. Here, you click Continue pixel setup → Meta Pixel → Connect.
In the Use pixels to connect activity on your website dialog, you click Self-install code.
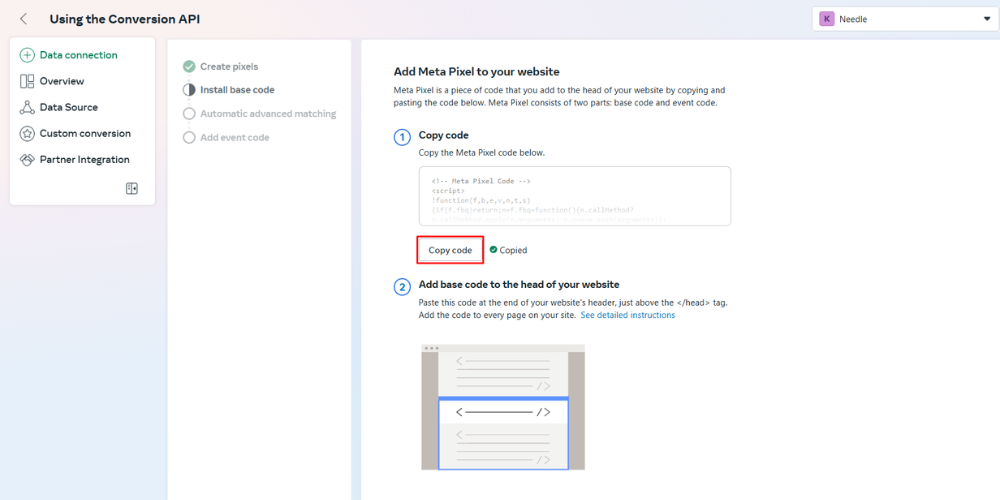
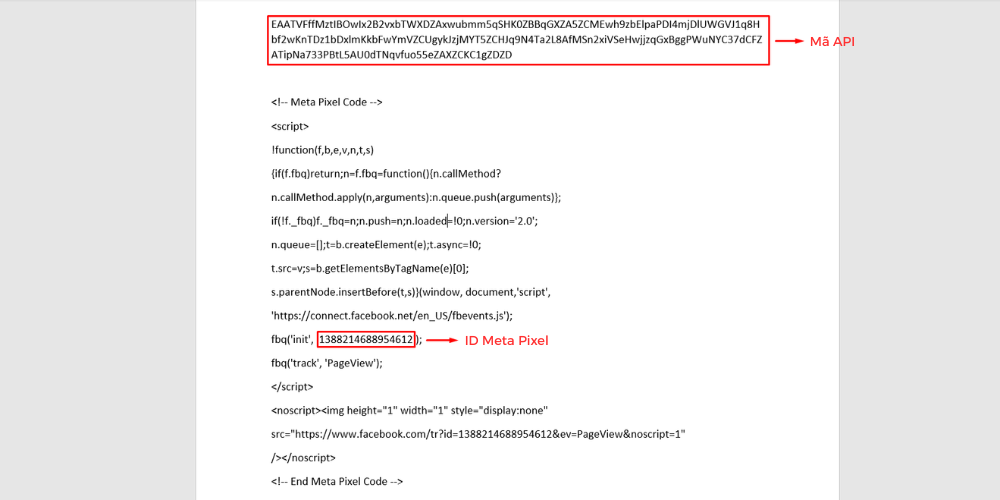
After the system successfully generates the Meta Pixel Code, you click Copy code → Paste this code into Word to get the Pixel ID → Copy the Pixel ID to prepare to install into the BettaMax store.
Step 6: Install Facebook Conversion API into the BettaMax store
On the Add Facebook Pixel screen on BettaMax, users perform:
- Pixel ID: Attach the Meta Pixel ID code
- Search: Search for the products that need to install Facebook Conversion API
→ After completing, click Add pixel.
See more: Guide to integrating TikTok Pixel into the BettaMax store
Step 7: Check Events
Access the Chrome extension page, search for Meta Pixel Helper → Install the extension into the Chrome browser.
Users operate on the Online Store page that has just attached Pixel → Click the Meta Pixel Helper icon on the browser toolbar to view the list of Pixels and triggered events.
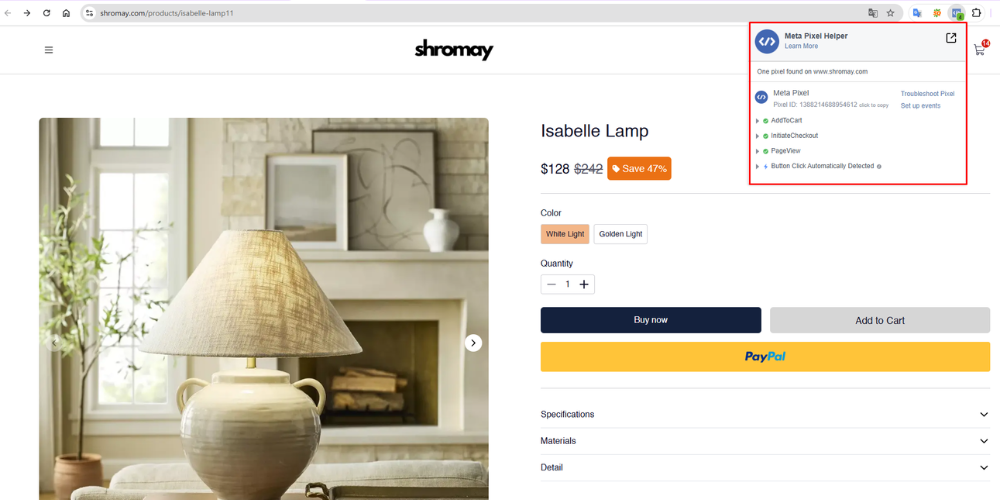
Note that you should reload the page and wait at least 30 minutes to accurately record events on the website.
Video Tutorial
Conclusion
After installing Conversion API into the BettaMax store, you will have more accurate data to optimize ads and increase sales performance. Don’t forget to re-check events with Meta Pixel Helper and Ads Manager to ensure everything is working correctly. Good luck!
If you do not have an account yet, don’t forget to register to open a store and start your dropshipping business journey on BettaMax right here!